There is an epidemic of discrimination in triathlon. One that is right under our noses, but many haven’t seemed to notice. I call it “Anti-Aerobar Accessory Syndrome”.
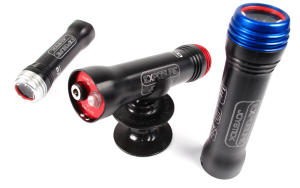
That’s right – many manufacturers of cycling accessories (lights, computers, cameras, and the like) love making their products compatible with 26.0mm or 31.8mm road and mountain bike handlebars. These bars face parallel to your torso, and present a relatively easy piece of real estate for mounting things to. Want to run a head light AND a Go Pro camera? No problem. Want to add a Garmin 500? Go for it – just add the Garmin stem mount, and you have space for all three items.
Now – if you ride a triathlon or time trial bike, your options are much more limited. Base bars are often wing-shaped, not round. The aero extensions typically measure 22.2mm in diameter (a relatively odd/small size). As we all know, these extensions run perpendicular to our base bars (rotated 90 degrees, so they face straight ahead). There are some solutions for using accessories on aerobars. You can use a Bar Fly TT mount for your Garmin or Joule GPS. You can buy a Profile universal computer mount, which is a small ‘nub’ to which you can attach accessories. What if I want more, though? And what if I want something that measures 31.8mm in diameter? What to do?
What you do is watch re-runs of the classic American TV show, MacGyver, for three hours. Then, you go to the hardware store to buy supplies. Finally, drive back home, hunker down in the garage, and make your own aerobar accessory mount. Here is my very own MacGyver-inspired design.

Getting Started
The list of materials is very short: PVC pipe and zip ties. The key is finding the right size PVC pipe. My local hardware store had many sizes, sold in convenient pre-cut 5’ segments. The cost of each piece is about two or three (US) dollars. Here’s what I bought:

It measures 32mm, or 1 ¼” – perfect. Just to be safe, bring your tape measure to the hardware store to double check before you buy.

The key measurement that you want to take on the bike is the space between the aero extensions. Mine is about 4.5cm; I like my extensions fairly close together. This measurement is critical because it will be the narrowest part of your accessory mount.

I wanted the widest part to overlap the extensions, so I added about 1.25cm to each end for the total width of the mount (7cm total). In the end, this is not an exact science. You just want there to be some amount of overlap.
Once you’ve decided on a length, cut it down with a hack saw:

Next, make marks for your minimum width (4.5cm in my case). Make two sets of marks, on opposite sides of the pipe.

Next, it’s time for the fun part – the Dremel. I used a universal grinding stone. Note that the diameter of this is smaller than the aero extension:

The idea is to carve out notches that will perfectly fit your aero extensions. To do so, I clamped the pipe lightly in a bench vice, and slowly carved material away.
Safety note: WEAR EYE PROTECTION! White PVC dust will get everywhere – there’s no way around it. You don’t want to get it in your eyes.

This is where some measure of artistry comes in. Just take it slow and don’t remove a ton of material at a time.

The best way to avoid screwing up is to check the fit on your aerobar often:

Here is my accessory adapter near completion. You can spend as much time as you want rounding the edges and making it pretty.

For final test fitting, you need to loosen or remove one of the aero extensions. That’s the only downside of this system – you can’t remove and install it as quickly as, say, a Profile UCM. With clip-ons like mine, you can loosen one of the mounting brackets, rotate it out of the way, slide the accessory mount in place, and raise the extension back in to place. For integrated bars with fixed extensions, you would need to completely remove one of them.
The upside to this is that the mount is very sturdy (important if you’re using a camera and want to reduce vibration and noise). If you do it right, the width of the mount will perfectly match your bars.
The next step is to drill holes for zip ties. You want these holes to be slightly inboard (say, 5mm) of the narrowest part of the pipe. With my 4.5cm minimum width, this means that I made drill marks about 3.5cm apart:

Once your marks are made, drill out the holes. I used a 9/64” drill bit, as this closely matched the width of my zip ties.

Now you can do the final installation with zip ties. I also wrapped my extensions in electrical tape, to ensure that the mount would stay put (i.e. not slide forward and backward) on rough pavement. In the photo below, I have my 31.8mm aluminum K-Edge Go Pro mount installed:

Total project time was about an hour, including photography.
Of course, this style of mount probably isn’t for everyone. If you use a Profile Aero Drink system (vertical bottle with a straw), it won’t work. I haven’t yet tried it with a horizontal bottle between the bars, but I imagine I could rig up something that would work. Lucky for me, my frame has two bottle mounts in the main triangle, so I don’t have to worry about it.
All images © Greg Kopecky / slowtwitch.com


