Here is my first stem change using the Formula SpeedLock. The video below is 7 minutes long, but the whole process probably took 35 minutes. Why did I choose to install this product when I built up a new road bike for myself, and what caused me to need to use this product immediately after building the bike up?
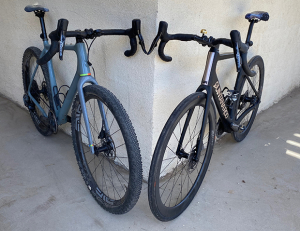
I hung a SRAM Force eTap AXS groupset on a Quintana Roo SRsix frameset. The SRsix is an aero road bike. As background, here is where we covered the launch of this bike. I also wrote about the FSA gravel bar I chose as this bike’s road bar (and why). And of course I’ve written before about the Formula SpeedLock.

But I’ve never used the SpeedLock until now, that is, I’ve installed it on bikes, but I never needed it until now. When I ordered up all the parts for this new bike of mine I mathed it out, the frame reach, handlebar reach, and the “run” of the stem (which is somewhat less than the stem's length, and is calculable). After all my calcs I determined that I'd probably need a 110mm stem.
Wronnggggg! As soon as I took tape measure to the built bike I realized I that 110mm stem wasn’t long enough. I needed a 120mm.
So, I got the new longer stem, and here is what one needs to do, ordinarily, with a bike that has hydraulic lines running through the stem: disconnect hydraulic hoses from shifters; draw the hoses back all the way to the steer column because the hoses run through the stem); change the stem; reroute the hoses to the shifter. If you do this according to the manufacturer’s spec, now you must cut off about 12mm of hydraulic hose (that contained the olive and the barb); reinstall new olive and barb, tighten the compression nut down onto the shifter (smashing the olive against the barb; and then rebleed both brakes.
This is the price of progress.
In my case, I unwrapped the handlebar tape off the tops, exposing the Formula SpeedLock hydraulic in-line connections. I disconnected the lines at the connections; changed the stem; pushed the hose back through the handlebar; reconnected the lines; rewrapped the tape. Done. What would have been a 90-minute job was not much more than a 30-minute job, and that 90-minute job would have been worse if my hydraulic lines weren’t long enough. Remember, I not only needed to cut a centimeter off the hydraulic hose using the typical method, I was installing a centimeter longer stem. So, the only way I’d have gotten out of that without needing to install at least one (if not two) new hydraulic lines is if I had enough hose shoved into the frame that I had 2cm of slack, and it is not easy to shove 2cm of slack into the fork.
With these in-line hydraulic quick-connects from Formula I can change the stem a dozen times and I’m gold. If you watch the video you’ll get a sense for how this goes. Now, for some reality talk.
The one handlebar system that is just tailor made for these is the new system Cervelo is using for the Caledonia 5 (image below), because the road/gravel handlebars Cervelo is now making do not internalize the hydraulic hoses, they are adjacent to the bar, and sit inside an impression in the bar for these hoses. It is very easy to just stick these connections in-line adjacent to the bar under the handlebar tape. But not all bars are like these.
I used an FSA K-Wing AGX and I found the best way was to have the hose enter a hole designed for hoses to exit. Imagine driving past a freeway offramp just to hang a U-turn and drive out the freeway onramp. That was my routing for this bar. It’s not ideal. The routing was complicated in a way my video did not show. It’s going to take a little while for us all to figure out how to best use these SpeedLocks, and/or for handlebar companies to design their bars with in-line connections in mind.
Best to draw out on a piece of paper the precise routing scheme before you start routing hydraulic lines. I think in most cases the best solution is just to place the connections inside the stem, and shove as much hose slack into the frame as you can. You remove the face plate, pull the handlebar away from the stem, exposing the connections.
SpeedLocks come with a lot of hydraulic line on both ends of the connection, so that you can orient the male/female connection parts to suit. But you can easily go wrong if you haven't thought out your routing.

This is about as technical an article as I’ve written in a while, and if you’ve gotten this far chapeau to you. But if we pan out to show the landscape view, it is this: If the bike maker solves a problem, only to create a new problem, we didn’t advance. The problem I’m writing about here is the solution to the new problem that arose (the lack of ability to change a stem) as a result of making the bike more aero. Yes, you could change the stem without an in-line hydraulic connection, but in point of fact many users just don’t change their stems, and just ride around on an ill-fitting bikes. I’m all for hydraulic brakes and hidden hoses, but a bike must be able to fulfill the main functions of a bike. It must fit you; the gears must change (and be of sufficient range); the bike must stop when you compress the brake levers.
Bikes today are much better than when I began riding; and they’re much better now than any of the bikes made in my own factory. Bikes have come a long, long ways in the last quarter century. But they are getting both easier and harder to work on, depending on the job, and a little more complicated to adjust. Check that. Tri bikes are getting more adjustable, and easier to adjust. It’s road and gravel bikes that are getting less and less adjustable. The SpeedLock is our fight-back against this trend.


