Our reader forum has been busy with lots of banter about tires, and more specifically – tubeless tires for road and triathlon. Several professional road teams have made the switch to tubeless, with some entirely abandoning the tried-and-true glue-on tubular tire. Tubeless continues to make inroads into triathlon, with notable pros such as Sebastian Kienle switching over.
This being the case, we're doubling down on our coverage of all-things-tubeless, to enable a continuation of the discussion, and to give our readers the most up-to-date information available. We’re not here to convince you to use tubeless tires, but rather offer a transparent hub of information around the topic, so you can make a decision for yourself.

Today, we’d like to talk about the cross-pollination between tubeless tires and traditional tube-equipped clincher tires (which we’ll refer to henceforth as ‘tubed’ tires). There are several pieces of technology that are used on both tubed and tubeless tires, along with some similar procedures – but enough differences that we’d like to clarify the situation. Note that we will not be discussing tubular tires in this article.
Tire Types

Above image © The Geeky Cyclist
We’ll start off simple with a point that’s obvious to many, but deserves clarification in the name of safety as tubeless tires become more common: If you want to run a tubeless wheel/tire setup, you should ONLY use a tire that’s specifically made to be set up tubeless. These are often labeled as TR or TLR, for tubeless-ready.

Above image © Park Tool
Now for the fine print. With mountain bike tires and even some gravel or cyclocross tires, people have gotten away with using a non-tubeless tire set up tubeless, using a conversion kit and tire sealant. These setups were originally desirable due to their extreme light weight – because TLR tires are reinforced with extra material. MTB and gravel tires use much less air pressure than road, so the likelihood of a catastrophic blowout is less when using a non-TLR tire (compared to high pressure road tires). These hybrid or unofficial tubeless setups are becoming less common over time, as TLR tires become lighter weight and more sophisticated.

Tubeless tire beads are intentionally made to be stronger, and with greater tolerance control on diameter. Original road tubeless beads from Hutchinson were VERY stiff and made with carbon, while the likes of Schwalbe and others have popularized easier-installing Aramid tubeless beads. You should never try to set up a non-tubeless road tire without an inner tube.
Rim Tape
Most rims still require rim tape, which covers the spoke holes on the inside of the rim channel (i.e. the outer diameter of the rim). These spoke holes would cause an inner tube to puncture when it contacts their sharp edges. For tubeless setups, the rim holes must be covered by tape to provide a 100% air tight chamber of air (or close to it), because all of your inflation air would rush out into those holes.

Above image © Schwalbe
It’s worth mentioning that there are some rims out there that feature no spoke holes in the outer rim bed, which usually don’t require any rim tape for either tubed or tubeless tires. We’re ignoring these rims for the moment, to focus in on rim tape.
What should you look for in rim tape? Isn’t any old tape fine?

For tubed tires, it’s become common knowledge that you want a nice and durable rim tape, with Velox-brand cloth tape being a perennial favorite for bike mechanics around the world. This still holds true, and I have a box of Velox in my garage still today. There are also non-adhesive nylon or plastic rim tapes that are a stretch fit over the rim, which tend to work fine as well (though they can become pushed off-center more easily than Velox, which has a light adhesive to help it stay put).
For tubeless setups, you need a stickier adhesive tape, and one which covers the entire rim bed. It also must be specifically sold as tubeless, intending to provide an airtight seal. Stan’s NoTubes created the first of this type that I’m aware of, with their famous yellow tape. It comes in multiple widths to satisfy different rim requirements, and it works fantastically well. There are now many tapes out there that follow a similar design theme, from the likes of HED, Silca, and others.

The beauty of these tubeless tapes is that they also work well for tubed tires, and they’ve quickly become my go-to style of tape. They’re thinner than the old Velox tape, helping to ease tire installation by making the effective diameter of the rim slightly smaller. Also, they’re slick across their surface, helping the tire beads slip up into place upon inflation – something that can be a big issue with tubeless rims (which we’ll cover in detail in the next section).
Tubeless tape comes in rolls, and the recommended application amount varies by wheel manufacturer. A common recommendation is for two complete wraps of tape around the rim, which is my go-to procedure if I’m in doubt. If I’m working with a tire that happens to fit particularly loose, I’ll do an extra wrap or two of tape to tighten things up.

As a final note, there are a few manufacturers who make a proprietary tubeless tape made specifically for their rims, such as Bontrager’s TLR rim strip (above). Always use manufacturer-recommended tapes when they provide or require them.
Rim Types
The most misunderstood aspect of tubeless tech is the inside rim profile. The image below should clear things up, with an old-style tubed rim (left) compared to a new-style tubeless-ready rim (right). As you can see, the older rims had a curved rim channel. As you inflate the inner tube, it pushes out on the tire, forcing the tire beads into the corners of the rim.

In comparison, tubeless-ready rims have a smaller curved channel (usually called a ‘dropped center channel’), with flat areas on either side – often called ‘shelves’ or ‘bead shelves’. While it isn’t necessarily obvious, the bead shelves sit up high – as in, the effective diameter of the rim is larger up on the shelf. This is for a reason: Tubeless tires must have a very tight (air tight) fit with the rim. Upon inflation, the tire beads get forced up and over the shelf, which results in an audible pop or snap.
Here’s the rub - and perhaps the most important part of this article - almost all mid-to-high-end clincher wheels sold today have the new tubeless-ready inner rim shape. Even if your new bike is equipped with inner tubes, chances are that the rims themselves are TLR. This is important because it changes the old procedure for installing or removing a tire – or changing a flat inner tube. This is a constant issue that I see out on the road when I stop to help someone change a flat, and it was even an issue for one of our own.
This video from Andy Tetmeyer at HED does a great job of explaining the proper procedure:
In short, the only new step is that you must make sure that the tire beads are all the way down in the dropped center rim channel around the entire circumference of the wheel (this applies to all tires – both TLR and tubed). That channel has a smaller diameter than the bead shelves – so the tire doesn’t fit so tight (i.e. so you can actually get the tire beads on or off the rim). It’s a small detail that, if missed, can make it impossible to remove or install a tire.
There are two more details about this topic to cover.
First, even if you use the dropped center channel properly, that doesn’t guarantee an easy tire installation. You see, not all rims are created equally, and I’ve encountered some with a center channel that isn’t deep enough, making life difficult. Some rims also add an extra little spike right at the edge of the bead shelf, as an extra measure of safety to keep the beads in place on the shelf.

Despite the good intentions, the extra spikes often make tire installation very difficult if they’re too tall. The image above is a cross section from the now-discontinued American Classic Lightning MTB wheel. It has a shallow rim bed plus very pronounced edges on the bead shelves (emphasized with red arrows). I spent well over an hour installing two very common tires on a pair of these wheels – having to go well above the maximum inflation pressure and using copious amounts of bead lubricant to finally get the tire beads in place. This issue is irrespective of TLR vs tubed tires – it makes installing ALL tires difficult. Always use a slick tubeless tape on such rims, which help the tire beads slip into place. The best way I’ve found to remove a tire in this case is to lay the wheel on the ground and carefully step on the side of the tire to smash it down into the dropped center rim channel.

The second final detail is that, even if a rim has a TLR inner profile, that doesn’t mean that the wheel is actually approved to be used with tubeless tires. What?!
Yes, the TLR inner rim profile is separate from other issues that make a wheel tubeless-ready, like carbon fairing thickness and compatibility with tubeless valves. For example, the HED Jet series has a TLR inner rim shape, and the carbon fairing on the other side of the rim is thin for tubeless valve stems – which must be tightened down significantly on the inside rim diameter. HED originally said this wouldn't work for tubeless, but they've since updated the policy. Here's from HED's Andy Tetmeyer: "The skin is thin but we do call those wheels ready for tubeless. We have tried hard to break the skin by over-tightening tubeless valves, and we can’t."
Note there have been reports in our forum of the Silca tubeless kit also working for HED Jets, but it might be best to ask HED what they allow under warranty. We reviewed Bontrager’s Aura 5, which have a thicker/heavier carbon fairing and are fully tubeless-approved – though our test set fit very tightly with their supplied tires.
The point is: Always double check to be sure that the manufacturer states that the wheel is fully tubeless-ready.
Tire Sealant

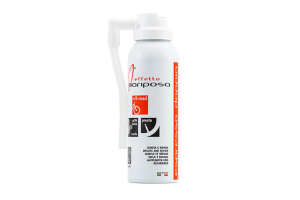
We’ve covered this topic in-depth, so we’ll just mention that your road and triathlon tubeless setups need to be paired with a tubeless-specific tire sealant. Not only do these potentially help to repair punctures on-the-fly, but they also seal up any imperfections in the air-tight seal between tire and rim.
These sealants may also be used with inner tubes, though they aren’t quite as effective due to the need to seal two separate layers of material (tube + tire). Also note that there are some tube-specific sealants that are not intended for tubeless tires and should never be used for road tubeless.
--
That’s it for this installment of Tubeless Tech! We’ll have more content on the way in the coming months.


